Showing posts with label Make it Monday. Show all posts

Monday, June 8, 2015

A Week of Budget Friendly Family Meals

This months "Make it Monday" is going to be a little different. Instead of a project, I want to share some of the meals that I make for our family that are budget friendly. Money seems to be tighter than ever these days which makes it even more important to serve economical meals.

By budgeting, meal planning & shopping 2x a month, I have been able to cut our grocery bill in half in addition to building up my long term food storage. I will be covering a lot of these topics in future blogs/vlogs. Some of the recipes have come from online while others are from cookbooks (which I purchased at the thrift store of course) or old family favorites. All are approved by even my picky eater! You will notice that almost everything is served over rice. Reason being that it makes meals go farther inexpensively. Also, here on the farm the extra carbohydrates come in handy! We usually have enough leftovers to reheat for lunch the next day.
 
 
Slow-Cooker Chili
Makes 10 servings                             

Ingredients
  • 1 lbs ground beef, browned and drained
  • 2 16oz cans red kidney beans, drained
  • 2 14 1/2oz cans diced tomatoes
  • 1 medium onions, chopped
  • 2 garlic cloves, minced
  • 2 to 3 Tbsp chili powder
  • 1 tsp ground cumin
  • 1 tsp black pepper
  • 1 tsp salt                                    

Instructions
  • Combine all ingredients in the slow cooker.
    Cover. Cook on Low 8-10 hours.
     
  • NOTE:
    Use leftovers over lettuce and other fresh garden vegetables to make a taco salad.
     
  • VARIATIONS:
    For more flavor, add cayenne pepper or a jalapeno pepper before cooking.
       Add 1 cup chopped green peppers before cooking.


Thrifty Stories    
F.A.D. Chicken Crockpot
This recipe was so incredibly easy that I dubbed it “Forget About Dinner” chicken crockpot. Really. I dumped it all in and walked away for hours. It was fabulous.

Ingredients
  • 1 (2.5 – 3 lb) bag frozen chicken (recipe called for tenderloins, I used breasts -worked fine)                                                                     
  • 1 block cream cheese                                                                     
  • 1 (15 oz.) can of corn (drained)
  • 1 (15 oz.) can of black beans (rinsed and drained)
  • 1 (10 oz.) can of Rotel tomatoes (generic is also fine)

Instructions
  • Dump everything in the pot in this order, select anywhere from 4-6 hours and happily skip away.
  • Shred chicken in the pot.
  • Serve over rice.


Southwest Rice and Beans
Servings: 4            

Ingredients                                        
    • 2 cups cooked rice (leftover from previous meals)           
    • 2 cups black beans, drained and rinsed if canned               
    • 1 cup corn                                        
    • 0.5 cup salsa               
    • 1-2 teaspoons cumin                                      
    • .5 cup shredded cheese (optional)                                                    

Instructions
  • In a bowl, mix rice, beans, corn, salsa, and cumin. Scoop into a baking dish and sprinkle with cheese, if using. Bake at 350 for 20 minutes or until cheese is melted and rice is warmed through. Sprinkle with fresh chopped cilantro or a dollop of sour cream, if desired. Serve as a side dish, or spoon into warmed tortillas and eat burrito-style.

Notes
Freezing Directions:
In a bowl, mix rice, beans, corn, salsa, and cumin. Scoop into a baking dish and
sprinkle with cheese, if using. Cover with foil and freeze.
To serve: Bake from frozen at 350 for 1 hour or until cheese is melted and rice is 
warmed through. Sprinkle with fresh chopped cilantro or a dollop of sour cream, if 
desired. Serve as a side dish, or spoon into warmed tortillas and eat burrito-style.


Serendipity & Spice    
Hamburger Hash Slow Cooker Recipe
Serves 4

Ingredients
  • 1 lb cooked ground beef                                    
  • 4 medium Red Potatoes diced                                                                 
  • 1 large Vidalia Onion diced                                                                     
  • 1 cup Carrots diced                                                                     
  • 1 can Cream of Onion Soup                                                                     
  • 1 can Diced Tomatoes                                                                     
  • 1 cup Shredded Cheese (I like to use Colby Jack but Mozzarella is good too)

Instructions
  • Toss all ingredients except cheese into the crock pot, stir well, and cook on low for 6 hours.
  • Once veggies are cooked to desired softness add in the shredded cheese and cook additional 15 minutes.
  • Sauce will thicken as it cools.

Notes: I buy such lean ground beef that to give extra flavor I add a couple of beef bouillon cubes.


Fix-It & Forget-It Cookbook    
Lemon Honey Chicken
Makes 4-6 servings            

Ingredients
  • 1 lemon                                    
  • 1 whole roasting chicken, rinsed                                                                     
  • 1/2 c orange juice                                                                     
  • 1/2 c honey

Instructions
  • Pierce lemon with fork. Place in chicken cavity. Place chicken in slow cooker.
  • Combine orange juice and honey. Pour over chicken.
  • Cover. Cook on Low 8 hrs. Remove lemon and squeeze over chicken.
  • Carve chicken and serve.

Notes:
 
         Serve with a salad and homemade rolls.


Red Beans & Rice
Makes 8-10 servings            

Ingredients
  • 1 lb pkg dried red beans (16oz)                                    
  • water                                    
  • salt pork, ham hocks or sausage, cut into small chunks                                    
  • 2 tsp salt                                    
  • 1 tsp pepper                                    
  • 3 to 4 c water                                    
  • 6 oz can tomato paste                                    
  • 8 oz can tomato sauce                                    
  • 4 garlic cloves, minced

Instructions
  • Soak beans for 8 hours. Drain. Discard soaking water.
  • mix together all ingredients in slow cooker.
  • Cover & cook on Low for 10-12 hours, or until beans are soft. Serve over rice.

Notes
Variation:
Use canned red kidney beans. Cook 1 hour on high & then 3 hours on low.
(These beans freeze well)


Six Sisters Stuff     
Slow Cooker Root Beer Pulled Pork Sandwiches
Makes 8 servings             

Ingredients
  • 1 (3 pound) pork roast (I used boneless)                                    
  • 1 (12 oz) can root beer                                    
  • 1 (18 oz) bottle of your favorite BBQ sauce
  • 8 hamburger buns

Instructions
  • Spray your slow cooker with non-stick cooking spray. Place roast inside slow cooker and pour the root beer over the meat. Cook on low for about 6-8 hours (or until meat easily shreds).
  • Take the roast out of the slow cooker and shred using two forks (it should just fall apart). Drain the root beer out of the slow cooker and place the shredded roast back inside. Stir in the bottle of BBQ sauce. Keep warm in the slow cooker until serving.
  • Place meat on hamburger buns and serve.


As you can see, I use my crockpot almost every day. Especially this time of year when I am so busy. It keeps me from having to worry about stopping whatever project that I am working on the homestead to cook dinner. I love the convenience! I cook long grain rice in my steamer and make up some homemade cornbread or biscuits in my cast-iron skillet. And don't forget your veggies!

At any rate, this should give you an idea of how to economize on your grocery budget. I have lots more recipes that I may share later but this should get you started. Have a great day!

Blessings!
Tina:) 
 

Monday, May 5, 2014

How to Make a Goat Milking Stand / Stanchion


Who needs a milking stand? Todays Make it Monday project is a DIY for the homesteader. I built this stand today with materials that I had on hand around our place. Honestly this didn't cost me a dime today! Almost everything is from FREE materials. Gotta love that!

Now, I know that I don't have a milking goat yet... I believe in being prepared though. This last week I started building our goat barn. With help from my daughter Janie and son Eric Jr., we erected the walls. I still have a lot to do on it though. Frame the entrance, reinforce with some 4x4s, put a roof on it and install stalls. It is defiantly a work in progress. Here's a photo of how it looks so far. I'll post more as it progresses.

Today however, I decided to build my milking stand. You can use it for more than just milking though. Anything that you would need to keep your goat still for (hoof cleaning & trimming, shaving, vaccinating) can be done on this stand. Since I plan on purchasing a doe in milk, this is something that I would need to have in advance. Now I do.

Tools that I used for this project were:
     *Chop Saw
     *Circular Saw
     *Drill
     *Hammer
     *Tape Measure
     *Pencil

The stand was made using the following materials that I had.
     *40x40 pallet
     *scrap plywood
     *scrap 2x6s
     *scrap 2x4s
     *scrap 1x4s
     *roofing nails
     *assorted screws
     *carriage bolt & nut
     *washers
     *latch hook     

As I said, all of these materials were free. The only things which I paid for (so long ago that I couldn't even tell you how much they cost) were the latch, screws and plywood. The pallet and other wood scraps were here on the property when we moved here. Score!


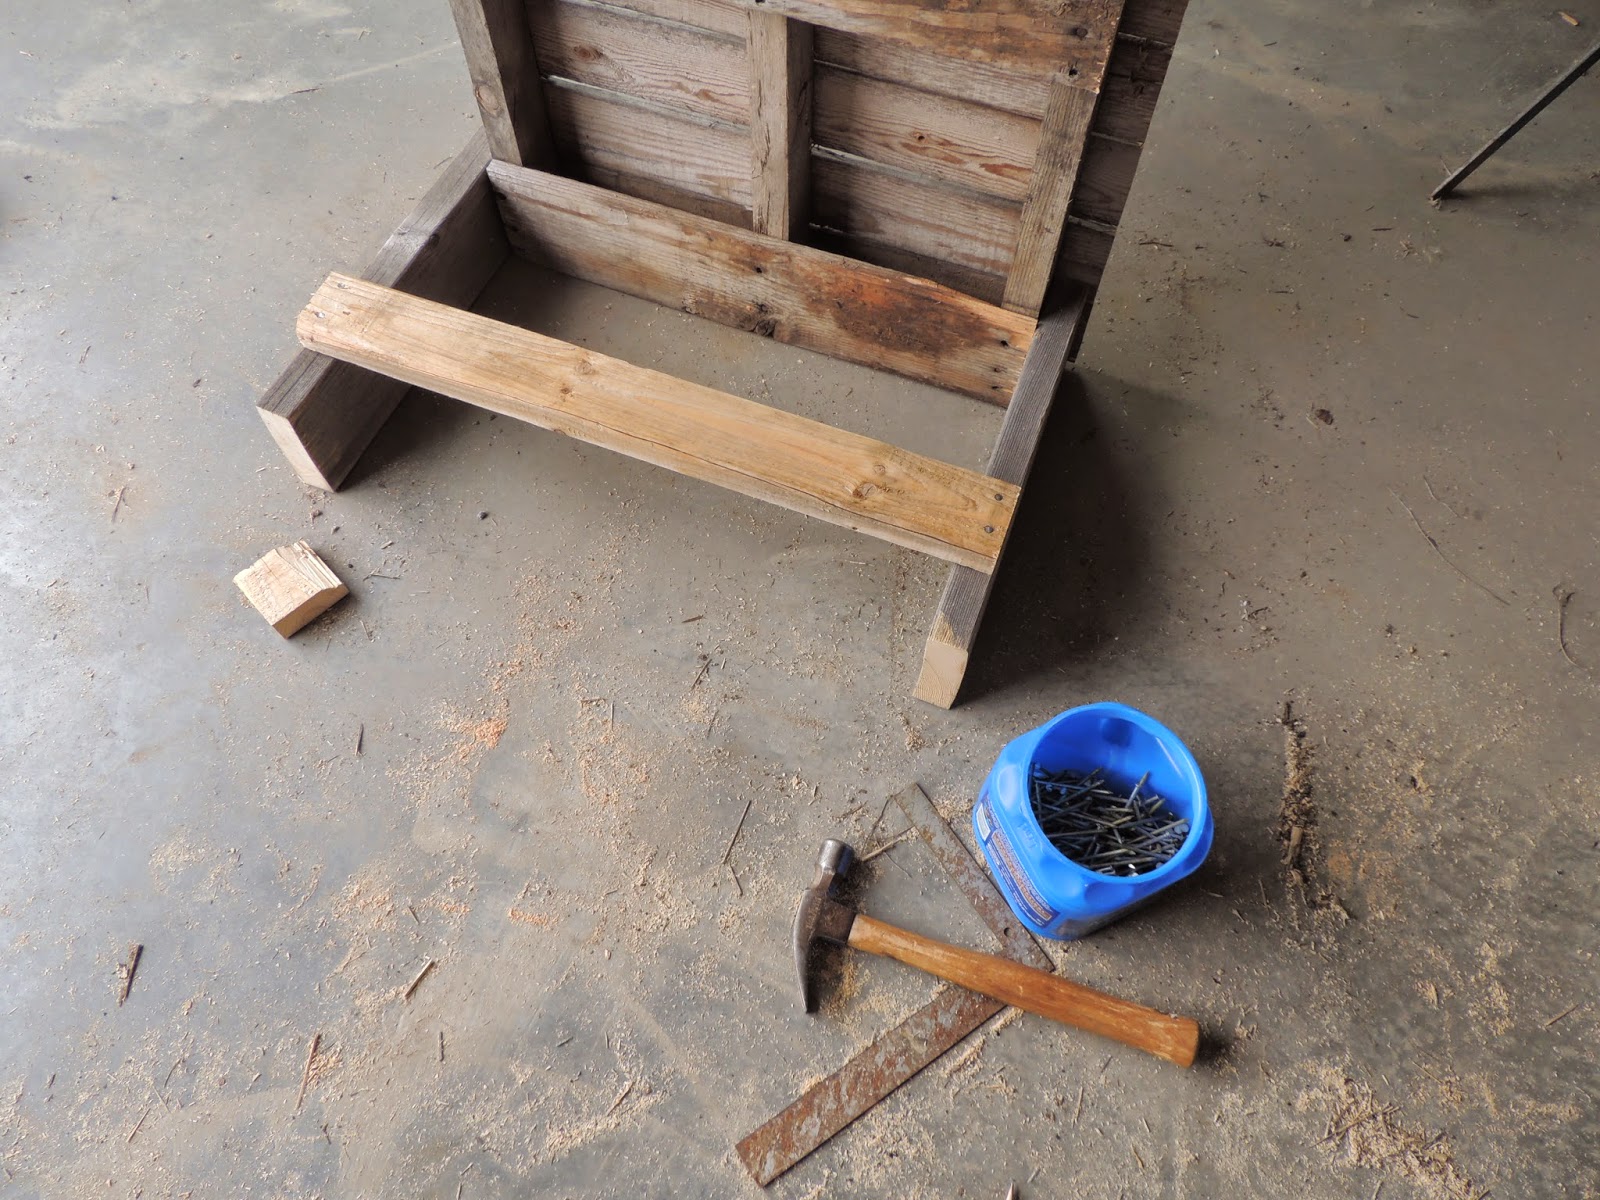
I snapped a chalk line and cut the pallet at 28" for the base. This pallet has two middle supports so I didn't have to alter anything to make the platform sturdy.


Both Sides cut. Platform is 40x28.


Next, I cut four 17 1/2" long legs out of 2x6 lumber. That makes the height of the platform about 18" high.  


After attaching the legs to the sides, I made 2x4 braces for both sets of legs and one across one end of the pallet.


The head brace is made with two 4 1/2' 2x6s and three 27 1/2" 2x6 pieces.


Here is how the framing for the head brace looks assembled.


Cut the 1x4 into two pieces, one 41 1/2" long and the other 47 1/2" long. Find the center of the brace and measure 2" on either side. That leaves a 4" opening for the goats neck. Attach the shorter piece with screws. Use the bolts, washers and nut to attach the bottom of brace after drilling  through both brace and 1x4 piece. This side will adjust to let the goats head through and then lock it in place for milking.


Add a hook at the top of the long 1x4 to lock it in place.


I cut a piece of plywood to cover the pallet and screwed it down for a smoother surface. It may not be very pretty but it is very sturdy and I believe that it will last a long time. All it needs now is a coat of paint and it will be ready to use.

One thing that I did not build yet is the holder for the feeder. I want to buy one first before I do so that I can decide the dimensions.

Not bad for an afternoons work. Pretty proud of myself! Hope this gives you some ideas for your own stand.

Now I just need a goat!

Have a great Monday,
Tina:)


Monday, April 28, 2014

TARDIS Knit Dishcloth Pattern


At the risk of exposing my inner nerd, todays Make it Monday project is the Dr. Who blue Police Box better known as the TARDIS ( Time And Relative Dimension In Space ). For those of you who do not know what that is... I'm sorry (you can go on Netflix and find out). For those of you Who do...this one's for you! (Couldn't resist the pun.)

I first watched the Doctor with my father when I was younger. It was the 4th Doctor back then for those of you who are fans. I wasn't really into it at that time though. It was just a way to hang out with my dad. That and watching football games. As all series do, it eventually ended in 1989. Of course I had ceased watching it long before that.

In 2005, they resurrected the show and my siblings became avid fans soon followed by my mother. I resisted! All that I could remember were those corny 70's shows and had no interest in watching. My two youngest kids, Layne and Eric Jr., were exposed to the show after spending the night at Grandma's last year. They were hooked but I still wasn't interested. After a conversation with my Mom, I agreed to watch an episode as she totally loved it. What could it hurt, right?

Well, after just that one episode, I was hooked! I love The Doctor now! My boys and I watch it together on Family Night. My husband Eric and my three oldest kids don't watch though. They haven't got the bug yet but the boys have gotten my mother-in-law to watch with them. It really is a fun family show.

I always have to be doing something while I watch TV though. I like to feel that I'm accomplishing something while sitting there loosing brain cells. I knit, crochet, do needle work... whatever is handy. I have been into making washcloths lately so I decided to incorporate some of The Doctor into my crafting.

There are several patterns on Ravelry.com for Dr. Who themed cloths but I decided to create my own. If you can do a knit and purl stich then you can do this. I tried to keep it simple. (This pattern is my own original work and is for personal use only. It may not be reproduced for sale without my written permission.)


TARDIS knit Dishcloth

Materials: Medium weight cotton yarn & size 7 knitting needles.

Gauge: Don't worry about it! This is a dishcloth.

CO 37

Rows 1-4      K1, P1 across (seed stich)
Row 5           (K1, P1)2, K29, (K1, P1)2
Row 6           (K1, P1)2, P29, (K1, P1)2
Row 7           Repeat Row 5
Row 8           Repeat Row 6
Row 9           (K1, P1)2, K3, P23, K3, (P1, K1)2
Row 10         (K1, P1)2, P3, K23, P3, (P1, K1)2
Row 11         (K1, P1)2, K29, (P1, k1)2
Row 12         (K1, p1)2, P4, K1, P2, K5, P2, K1, P2, K5, P2, K1, P4, (P1, k1)2
Row 13         (k1, P1)2, K4, P1, K2, P5, K1, P1, K2, P5, K2, P1, K4, (P1, K1)2
Row 14         Repeat Row 12
Row 15         Repeat Row 13
Row 16         Repeat Row 12
Row 17         (K1, P1)2, K2, P1, K9, P1, K9, P1, K4, (P1, K1)2
Rows 18-29  Repeat Rows 12-17
Row 30         (K1, P1)2, P4, K1, P3, K1, P1, K1, P3, K1, P3, K1, P1, K1, P3, K1, P4, (P1, K1)2
Row 31         (K1, P1)2, K4, P1, K3, P1, K1, P1, K3, P1, K3, P1, K1, P1, K3, P1, K4, (P1, K1)2
Row 32         (K1, P1)2, P4, K1, P2, K1, P1, K1, P1, K1, P2, K1, P2, K1, P2, K1, P2, K1, P2, K1, P4, (P1, K1)2

Row 33         Repeat Row 31
Row 34         Repeat Row 30
Row 35         (K1, P2)2, K4, P1, K2, P5, K2, P1, K2, P5, K2, P1, K4, (P1, K1)2
Row 36         (K1, P1)2, P4, K1, P9, K1, P9, K1, P4, (P1, K1)2
Row 37         (K1, P1)2, K4, P1, K9, P1, K9, P1, K4. (P1, K1)2
Row 38         (K1, P1)2, P4, K1, P2, K15, P2, K1, P4, (P1, K1)2
Row 39         (K1, P1)2, K4, P1, K2, P15, K2, P1, K4, (P1, K1)2
Row 40         Repeat Row 38
Row 41         (K1, P1)2, K4, P1, K19, P1, K4, (P1, K1)2
Row 42         (K1, P1)2, P4, K1, P19, K1, P4, (P1, K1)2
Row 43         (K1, P1)2, K4, P21, K4, (P1, K1)2
Row 44         (K1, P1)2, P4. K21, P4, (P1, K1)2
Row 45         (K1, P1)2, K6, P17, K6, (P1, K1)2
Row 46         (K1, P1)2, P6, K17, P6, (P1, K1)2
Row 47         (K1, P1)2, K8, P13, K8, (P1, K1)2
Row 48         (K1, P1)2, P8, K13, P8, (P1,K1)2
Row 49         (K1, P2)2, K13, P3, K13, (P1, K1)2
Row 50         (K1, P1)2, P13, K3, P13, (P1, K1)2
Row 51         Repeat Row 49
Row 52         Repeat Row 6
Row 53         Repeat Row 5
Row 54         Repeat Row 6
Row 55         Repeat Row 5
Rows 56-59  Repeat Rows 1-4

Bind off.


Well, there you have it. My version of the TARDIS. I think that I will be creating other Dr. Who themed patterns so that I can have a whole set. How cool would that be!? Ok, ok... yes I'm a nerd. If you catch an error in the pattern, let me know. Those of you who love the Doctor as much as I do, enjoy!

Have a great Monday!

Tina:)         


Monday, April 14, 2014

Chewy Peanut Butter Chocolate Chip Granola Bars


One of my kids favorite treats is on the agenda today for Make it Monday, Chewy Peanut Butter Chocolate Chip Granola Bars. My children packed these in their lunch when they were in school and I even sent these to my son Joshua when he was stationed in Afghanistan with the Marine Corps. He told me that he had to start stashing them when I sent them so that his buddies wouldn't eat them all. They are always a hit!

It is a simple and pretty quick treat to whip up. The boys came rushing to the kitchen to see what I was baking this morning once that yummy smell wafted upstairs. It was hard to get them to wait until they cooled to have one!

Chewy Peanut Butter Chocolate Chip Granola Bars
(Makes 24 Bars)

Ingredients:
1 cup firmly packed brown sugar
2/3 cup peanut butter
1/2 cup light corn syrup
1/2 cup butter, melted
2 tsp. vanilla
3 cups quick-cooking rolled oats
1/3 wheat germ
1 cup semi-sweet chocolate chips

Directions:
Heat oven to 350 degrees. Grease 13x9 inch pan. In a large bowl, combine brown sugar, peanut butter, corn syrup, butter and vanilla: blend well.


Stir in remaining ingredients.


Press mixture evenly in prepared pan.


Bake at 350 degrees for 15-20 minutes or until light golden brown. Cool completely.


Cut into bars.


Optional Ingredients:
1/2 cup coconut
1/2 cup sunflowers nuts
1/2 cup raisins
2 Tbsp. sesame seeds
You can substitute carob chips if desired

I like to wrap them in waxed paper before I put them in the cookie jar to keep them from sticking together as they are chewy and gooey (Yum). It also makes them easier to grab and go when packing snacks or lunches. Not that they last all that long!

As you can see they are really easy to make and trust me, everyone will love them. You can add just about anything (or everything) in these to suit your own personal taste. Make it your own!

Enjoy!
Tina:)

Monday, April 7, 2014

He Has Risen!

Easter is only two weeks away. So, in honor of our Lord Jesus Christ, this Make it Monday project is an Easter centerpiece. It depicts the  three crosses to remind us of His crucifixion and death which paid the price for our sin as well as the empty tomb which proved his resurrection, conquering sin and death. I found this idea on Pinterest. I was unable to locate the original source. Whoever you are... thank you for the inspiration!

This is a simple project that the kids can help you with. My youngest son Layne helped me out. You will obviously need to do this in advance of Easter Sunday in order for your grass to grow. (I really should have made mine sooner.) You can substitute moss or groundcover plants from your local nursery if you wish to do this as an Easter project.

This is the photo which inspired my project.


Our scene is similar to this although I had to improvise on some of my materials. Here's the list of what we used.

1 plastic oil pan (couldn't find a terracotta base large enough)
1 small plastic pot
Dirt from the yard (Free!)
Small stones + 1 large rock for the tombstone (also from the yard)
Several small twigs
Raffia
Grass seed


This is all that I purchased. Everything else was found around the house. All together it only cost me about $5.00 at Walmart.
 

Layne filled our pan with dirt from the yard. 


We buried out pot sideways in the dirt making our tomb mound. Found the perfect flat rock for the tombstone out in the field along with smaller stones for our path. (No shortage of rocks on the property here!)
 
 
We needed sticks for our crosses so we went across the field to hunt for some since we don't have any trees yet on our property. Farmer Fred has a wooded spot in his field where we found lots of twigs. Thanks Fred!
 

Next we added our grass seed. I moistened the soil first with a spray bottle and then spritzed it again after seeding to water it.


To make our crosses we cut our twigs to length and tied them together with some natural raffia that I had on hand. I think that it turned out really great! Hopefully the grass will sprout before Easter but, even if it doesn't, it is still a wonderful reminder of what this season is all about.

"But the angel said to the women, "Do not be afraid, for I know that you seek Jesus who was crucified. He is not here, for He has risen, as He said. Come, see the place where he lay.""                  Matthew 28:5-6

Enjoy making your own resurrection scene and have a great day!
God Bless!
Tina:)

Monday, March 24, 2014

Ridged Chevron Stich Dishcloth/Washcloth


If you don't use handmade cotton Dishcloths and Washcloths here is your chance! Today for my "Make it Monday" project I am sharing a free crochet pattern created by me.

I love using these for doing the dishes, no more germy and smelly sponges. They hold up forever! I had a cotton handmade dishcloth given to me as a wedding present and it lasted over 15yrs before it vanished (things like that happen when you have kids).

The washcloths that you purchase at the store are expensive, if you buy quality, but even then they really don't last long once the family starts to use and abuse them. These do! As far as care, I put them through the washer and dryer (yes they will shrink so make them a little larger to allow for that). As they shrink it seems to really lock together the yarn to make a very durable cloth. Can you tell that I love these?

 
Ridged Chevron Stich Dishcloth/Washcloth

Materials: Lion Brand Recycled Cotton in "Sunshine" & Size I/9 (5.50mm) Crochet Hook

Instructions: Chain 39

1st Row: Skip first 3ch (counts as 1dc), 1dc into next ch, *1dc into each of next 3ch, [over next 2ch work dc2tog] twice, 1dc into each of next 3ch, [2dc into next ch] twice; rep from * ending last rep with 2dc once only into last ch, turn.

2nd Row: 3ch (count as 1dc), 1dc into first st, always inserting hook into back loops only of each st *1dc into each of next 3 sts, [over next 2 sts work dc2tog] twice, 1dc into each of next 3 sts, [2dc into next st] twice; rep from * ending last rep with 2dc once only into top of tch, turn.

Repeat 2nd Row 13 more times and bind off, weaving in ends to finish.


If you don't know how to crochet or are confused by any of the terms, there are tutorials on www.RedHeart.com and YouTube. I personally learned the old fashioned way, from books. This Kindle book Crochet 101: Master Basic Skills and Techniques Easily through Step-by-Step Instruction is rated 4.9 stars if you like eBooks or  A to Z of Crochet: The Ultimate Guide for the Beginner to Advanced Crocheter if you like to have an actual book in hand like I do. It's rated 4.7 stars and is great for all skill levels.

This pattern took about an hour to make one cloth and I was able to make two cloths with one ball of yarn. If you use other cotton yarns like Lily brand, usually one ball makes one cloth this size. I try to learn new stiches from time to time to incorporate into my dishcloth collection. I will share others with you as I create them. If you don't have time to make these yourself, I do sell them online in my Etsy shop, www.LivingSewGreen.etsy.com along with several other colors and patterns.

I'll try not to miss a Monday in the future. At you later!

Tina :)

Monday, March 10, 2014

Homemade Deodorant


As promised, todays "Make It Monday" project is something a little different. I decided to make my own deodorant. In my quest to live a more healthful life this is the next thing that I am tackling, personal care products.

There is much information concerning the dangers of the ingredients contained in the personal products which we use every day. For reasons that I can not fathom, manufacturers continue to make them regardless of the detriments to the health of consumers. I suppose if people continue to purchase them then nothing will ever change. I will no longer be one of those people though.

The aluminum in your typical antiperspirant has been linked to breast cancer among other things. I won't reiterate all the studies and research here as a quick search on the internet will lead you to a plethora of information which will scare you silly! It certainly did me. Hence, my decision to finally make my own homemade personal products starting with my deodorant.

There are tons of recipes on the internet for all types of deodorants. You can find concoctions for powder, spray, roll on, stick or cream. Initially I was going to make a stick type. I even saved and cleaned out old tubes that I had to do just that, but instead I decided to make a cream to start with. (The whole plastic thing, you know.) I figured that way I could perfect my recipe first and then decide whether to make the stick.

After perusing several sites and recipes, I decided to kinda wing it and see what happens. Here is what I came up with.

Homemade Cream Deodorant
(Butters and essential oils can be purchased at Mountain Rose Herbs )

Ingredients:
6 Tbsp. Shea Butter
6 Tbsp. Cocoa Butter
1/4 c. Baking Powder
1/4 c. Baking Soda (Aluminum free)
10 drops Tea Tree Oil
10 drops Lavender Oil

Directions:
In a glass Mason jar, I melted the butters. (I didn't have a double boiler handy so I used my steamer instead. It worked great.)


I turned off the heat and added the powder and soda. Mix well until all the lumps are gone and it is a creamy texture. 


This is when I added my oils. All that is left is to pour it into a glass container and let it cool. If you are inpatient you can do what I did and put it in the fridge to speed it up.


I happened to have some really cute old canning jars with tin lids that I received from my mother-in-law. They are the perfect size as this recipe makes approximately 8 oz. of deodorant. After setting up, it is the texture of natural peanut butter. I suspect come summer, it will be more like softened butter. It should last me quite a while.

Now, a couple of quick tips regarding deodorant over antiperspirant. You are going to sweat. The powders in the recipe will help to absorb moisture, but if you are working hard you will still sweat. That is ok and how it should be. God made us to sweat. Some people associate sweating with stinking. Not so! It is the bacteria that grows under your arms that causes odor. The essential oils I chose have anti-bacterial and anti-fungal properties to take care of that issue.

You may have an adjustment period while your body is detoxing. I think that I am going through that myself right now. I am using it about every other day while I adjust to it. I do love it though! Just a dab on your finger and apply like lotion to your underarms. It absorbs quickly and I haven't had any discoloration or residue on my shirts like I did with traditional antiperspirants (no matter what they said). I will continue with this formula for a while and adjust it as needed.

I will probably have to make a stick version for my husband and boys though. I don't see them using it as I do. So, I'll add some beeswax and switch up the scents for them. Guess I will be using those recycled tubes after all.

I will let you know how this formula works for us and update as necessary if I find that I need to change anything. If you have a recipe for deodorant or any other personal product that you enjoy please feel free to share them. I will be looking for other recipes to make hair care products next.

Have a great week.

Tina :)


Saturday, March 8, 2014

Traveling Socks


Now, I know that it isn't Monday but today I thought that I would share my favorite sock pattern with you.

I will be forgoing my play day in the craft room in favor of visiting family. It should be a lot of fun. It is such a beautiful day here! Whenever I go somewhere I always bring my knitting with me. It is a nice productive way to pass the time as we visit. It's hard for me to be idle. I usually am working on a pair of socks at any given time. It makes the perfect take along project as it doesn't take up much room to tote around.

My favorite pattern is from Red Heart Yarn for their self striping socks. I have used it for years with just a couple adaptations. I love using the striping yarn because they are so pretty when they are done and it is easier than carrying several different colors with me to create a pattern. Just not into plain Jane socks.

So, here is the basic pattern. (I do a K3, P1 to make them ribbed for the leg and top of the foot.) 

Self-Striping Knit Socks
LW1619

Directions are for size 5-5½; changes for sizes (6- 6½, 7-7½, 8-8½, 9-9½, 10-10½, 11-11½, 12-12½) are in parentheses.

RED HEART® “Heart & Sole™”: 2 (2, 2, 2, 2, 2, 3, 3) Balls No. 3965 Razzle Dazzle.
Double-pointed Knitting Needles: 2.75mm [US 2]. Stitch marker; yarn needle.


GAUGE: 36 sts = 4”; 48 rnds = 4” in St st. CHECK YOUR GAUGE. Use any size needles to obtain the gauge.

NOTE: Slip all sts as if to purl.

LEG: Cast on 48 (52, 56, 60, 64, 68, 68, 68) sts, dividing sts on 3 needles. Join to work in the round taking care that sts are not twisted. Work in K2, P2 ribbing for 1¼ (1¼, 1½, 1½, 1½, 1¾, 1¾, 1¾)”. Now work in St st, K every rnd, until 7 (7, 8, 8, 8½, 9, 9½, 9½)” from beginning.

Divide for Heel: With the 4th needle, K12 (13, 14, 15, 16, 17, 17, 17) sts on first needle, slip the same number of sts from 3rd needle onto the opposite end of the 4th needle – 24 (26, 28, 30, 32, 34, 34, 34) sts on 4th needle for Heel. Cut yarn. Divide the remaining 24 (26, 28, 30, 32, 34, 34, 34) sts evenly onto 2 needles for the Instep to work later.
With wrong side of work facing and working on heel sts only, work as follows: Row 1 (Wrong Side): Slip 1, P to end. Row 2: * Slip 1, K1; repeat from * across. Repeat Rows 1 and 2 for 2 (2, 2, 2¼, 2¼, 2¼, 2¼)”, end by working Row 1.


Turn Heel-Row 1 (Right Side): K14 (15, 16, 17, 18, 19, 19, 19) sts, K2tog, K1; turn. Row 2: Slip 1, P5, P2tog, P1; turn. Row 3: Slip 1, K6, K2 tog, K1; turn. Row 4: Slip 1, P7, P2tog, P1; turn. Continue in this manner, working 1 st more st before the decrease every row until all heel sts have been worked, end by working a K row – 14 (16, 16, 18, 18, 20, 20, 20) sts remain.

Gusset: With the first needle, pick up and K12 (12, 12, 16, 16, 16, 16, 16) sts along edge of heel; slip the Instep sts onto one needle and with the 2nd needle, K24 (26, 28, 30, 32, 34, 34, 34) sts of Instep; with the 3rd needle, pick and K 12 (12, 12, 16, 16, 16, 16, 16) sts along other edge of heel and with same needle K7 (8, 8, 9, 9, 10, 10, 10) sts from heel needle. Slip remaining sts from heel needle onto first needle. There are 19 (20, 20, 25, 25, 26, 26, 26) sts on first and 3rd needles and 24 (26, 28, 30, 32, 34, 34, 34) sts on 2nd needle.
Shape Instep-Rnd 1: K to last 3 sts on first needle, K2tog, K1; K cross 2nd needle; on 3rd needle, K1, slip 1, K1, psso, K to end. Rnd 2: K. Repeat last 2 rnds until 12 (13, 14, 15, 16, 17, 17, 17) sts remain on each of the first and 3rd needles. Work even until 4 (4¾, 5½, 6¼, 7¼, 8, 9, 10)” from center back of heel.
Shape Toe-Rnd 1: K to last 3 sts on first needle, K2tog, K1; on 2nd needle, K1, slip 1, K1, psso, K to last 3 sts, K2tog, K1; on 3rd needle, K1, slip 1, K1, psso, K to end. Rnd 2: K. Repeat last 2 rnds until 16 sts remain. With 3rd needle, K across sts of first needle – 8 sts on each of 2 needles. Cut yarn leaving a 20” length of yarn. Graft sts together.

Grafting: Thread needle with yarn. Holding the 2 needles together with yarn at the right of the back needle, draw yarn through next st on front needle as if to purl, leave st on needle,* draw yarn through next st on back needle as if to knit, leave st on needle, draw yarn through same st on front needle as if to knit, drop st off needle, draw yarn through next st on front needle as if to purl, leave st on needle, draw yarn through same st on back needle as if to purl, drop st off needle. Repeat from * until all sts are grafted together. Fasten securely on wrong side. Take care to draw yarn up so that gauge of grafting equals gauge of knitted sts.

RED HEART® “Heart & Sole™ with Aloe”,   Art. E745 available in multicolor 1.76 oz   (50 g), 213 yd (195 m) balls.
ABBREVIATIONS: K = knit; mm = millimeters; P = purl; psso = pass the slipipped st over; rnd = round; sl = slip; St st = Stockinette stitch (Knit every round); st(s) = stitch(es); tog = together; * = repeat whatever follows the * as indicated

I have used this pattern with all types of sock yarns with success. I really like using wool blends in particular. You just have to remember to not dry them in the dryer!

Hope you enjoy making these. I have dozens of pairs and love them! But, now I'm off to the in-laws. Hope you have a great day!

Tina :)