Thursday, February 27, 2014

Homemade Cleaners That Work & Save You Money


Everyone has to clean their home. That is one chore that none of us can avoid! There is no need to buy expensive and toxic cleaners to accomplish this task though. With these inexpensive and easy to find products, you can clean anything in your house.

I have been making my own laundry soap for several years now, and it has saved me a bundle! I make up a 5 gallon bucket of detergent concentrate twice a year. That is for a family of seven, doing more tubs of laundry than I care to count a week, in my front-loading machine. I initially found this recipe in A Love That Multiplies: An Up-Close View of How They Make it Work by Michelle & Jim Bob Duggar. That one recipe is what got me started. This year I made it my goal to make all my own cleaners and now I am happy to say that I no longer use any commercially prepared products! Yeah for me!

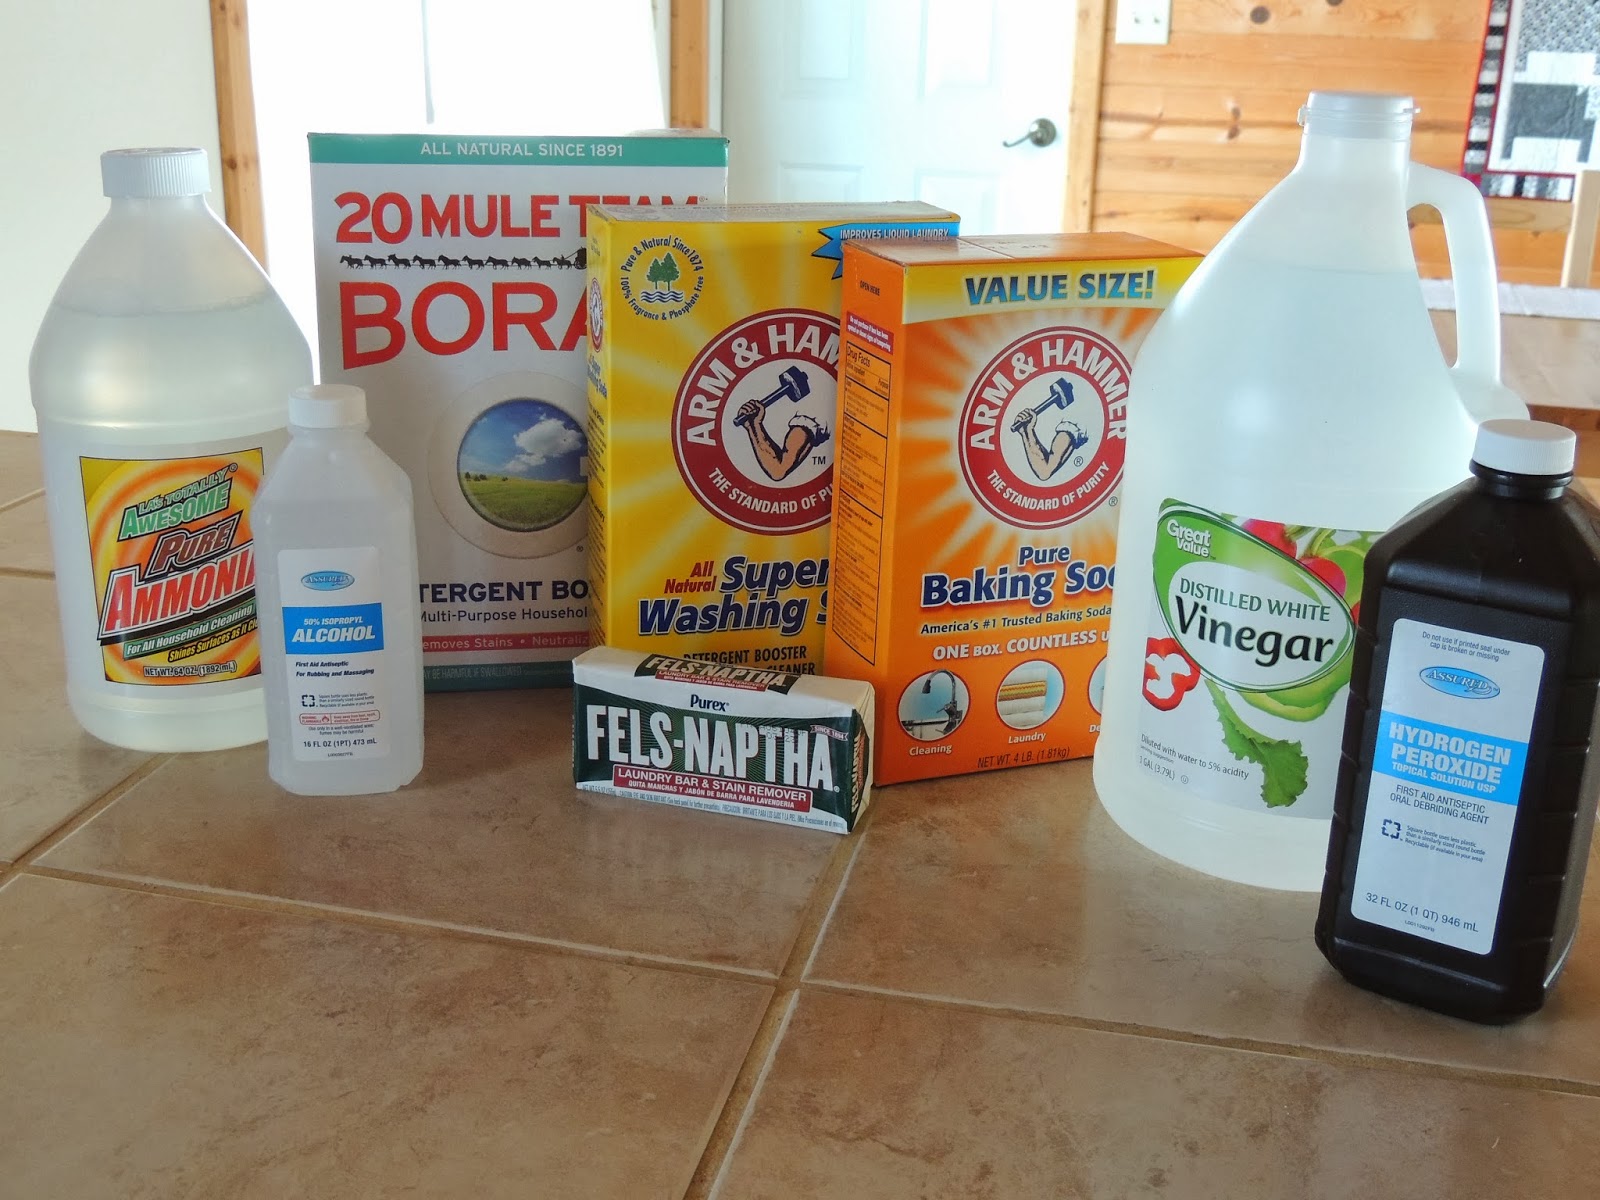
My ingredients and cost:
  Borax (76 oz) - $3.97
  Washing Soda (55 oz) - $3.24
  Baking Soda (4 lbs) - $2.24
  White Vinegar (1 gal) - $2.38
  Ammonia (64 oz) - $1.00
  Isopropyl Alcohol (16 oz) - $1.00
  Hydrogen Peroxide (32 oz) - $1.00
  Laundry Bar (5.5 oz) - $0.97

Total Cost = $15.80

These ingredients last a long time! For example, I purchased my Borax and Washing Soda 3 yrs ago (for less than it costs now). I have made 7 batches of laundry soap and still have a lot left. I did have to buy a laundry bar each time so, I have spent $14.00 for 3 1/2 years worth of laundry soap. This is just one example of how great a savings you can see making it yourself!

So, with no further ado, here are the recipes that I use. There are lots of them out there on the net so if one of these doesn't appeal to you, you have many other options. Let's get started!

Homemade Laundry Soap Concentrate
For front-loading machines use 1/3c per load, for top-loading 1c per load

Ingredients:
1 Fels Naptha soap bar, grated
1 cup Washing Soda
1/2 cup Borax

Directions:
Grate the soap bar in a small saucepan. Cover with hot tap water. Cook over Medium-Low, stirring continually, until soap is completely dissolved.

Put washing soda and borax in a 5 gallon bucket. Pour in the hot, melted soap mixture. Stir well until powder is dissolved.

Fill the bucket to the top with more hot tap water. Stir, cover securely, and let set overnight. (You can add a few drops of your favorite essential oil at this point if you want your soap scented.)

In the morning, stir the mixture. Mix equal amounts of soap concentrate and water in a smaller laundry detergent dispenser or container. Shake gently before each use.

{tips: 1- When melting soap do not let it get too hot or stir too vigorously or it will foam up, making it difficult to melt. 2- I just reach in and stir with my hand in the morning. I find it easier to break up the gel. 3- I use White Vinegar or Hydrogen Peroxide instead of Bleach. I no longer keep Bleach in my home.}


Dishwasher Detergent Powder
1 Tbsp per load

Ingredients:
2 cups Borax
2 cups Washing Soda
1/2 cup Kosher Salt

Directions:
Mix together all ingredients and store in an airtight container or jar.

*I also use White Vinegar in my rinse aid dispenser and my dishes come out beautiful every time! No spots, streaks or residue even though I have hard well water.


Floor Cleaner
For tile, laminate or vinyl floors.

Ingredients:
1 cup White Vinegar
Warm water

Directions:
Pour vinegar into a 1 gallon jug (I use a clean repurposed milk jug). Fill the remainder with warm water and shake to mix.

*This is what I use in my stick mops refillable dispenser. You can add a few drops of your favorite essential oil if desired.


All Purpose Cleaner
For general cleaning of Kitchen, Bathroom and other surfaces.

Ingredients:
2 Tbsp White Vinegar
1 tsp Borax
a few drops of liquid dish soap
hot water

Directions:
In a clean 16oz spray bottle, mix white vinegar, borax, and a some hot water until borax is dissolved. Add your liquid dish soap and fill the spray bottle up the rest of the way with hot water. Shake gently to mix. You may add your favorite essential oil if desired.


Window Cleaner

Ingredients:
3 Tbsp Ammonia
1 Tbsp White Vinegar
Water

Directions:
Combine ammonia & vinegar in a 16oz spray bottle. Fill the remainder of the bottle with water. Use on windows and mirrors with a microfiber cloth.


Scouring Powder

Baking Soda! Simple as that!


*** Never combine Bleach with Ammonia or Vinegar (or any other acid) as it will produce toxic fumes!!! ***


As you can see I have been busy! I love using these cleaning products that I make myself though. I just feel like my house is cleaner! No more toxic residues on everything. I absolutely love it!!! I know you will too. (The only recipe that I didn't include was liquid dish soap. I am still tweaking that one. I'll post it once I decide what works best for me.)
   
Now, just a few words on storage and containers. I use repurposed containers when I can (coffee cans, milk jugs, mason jars, old laundry detergent bottles, etc...). When I do purchase containers I visit my local Dollar Store. That way I pay $1.00 for a spray bottle instead of $3.00 at a big box store. (I can also get microfiber cloths there as well some of my ingredients.) Don't pay more than you have to!


As you can see, I like to label my cleaners as well as write the recipe on the bottle. That way I have it right there when I need to make it again. The skull and cross-bones should amuse my family (we are a little warped like that). I use these same 3Qt containers (from the $ store) in the kitchen to store bulk flour and sugar. Didn't want anyone to be confused. :)

About Essential oils. Several oils have anti-bacterial properties and are a good addition to your cleaners. Tea Tree Oil, Lavender and Lemon are just a couple of the more common ones. Not only will they add more germ killing power to your cleaners, your home will smell amazing! I get my essential oils at Mountain Rose Herbs . 

What is your favorite homemade cleaning recipe?
 
What scents do you like best?
 
Where do you get your supplies?
 
I would love to hear from you so feel free to comment. Have a great day and I'll talk to you soon. God Bless!
 
 
Tina :)

Monday, February 24, 2014

DIY Stick Mop Cleaning Pads


Welcome again to MAKE IT MONDAY! I trust you had a restful weekend and are ready to jump into another fun sustainable home project! I am having so much fun here on the homestead crafting ways to make our lives better. I hope you are enjoying it so far.

Todays project as you can see is making reusable cleaning pads for my new stick mop. A little background info before we start though.

I have used a bucket and mop for cleaning my floors forever. I even used a Swiffer for quick clean ups for a while. The refill pads can get expensive though if you use it a lot. Since I have switched to natural cleaning products I was looking for a way to save on my ingredients while cleaning as well. I hated to mix up my cleaner in the bucket and soon after have to dump it and remix when the water got dirty. So, I decided to look into stick mops with a reservoir for my cleaning solution.

I visited my local Walmart to see what was available. There are a lot of different models out there now. All stick mops are not created equal though! Here is a general review of what I found and my impressions.

Some models serve as a vacuum or steamer and mop together. I have a vacuum, broom and steam cleaner so I don't need those features. Plus, most used batteries or had to be plugged in to power the unit. Not interested!

Many do not have a refillable cleaning solution reservoir. They want you to buy their pre-packaged chemicals. Now I have seen pins on Pinterest where people have figured out ways to refill those bottles but for me that is too much work.

Others are your basic stick mop with refillable reservoirs and have various sized heads and cleaning pads. I eliminated those with hard plastic heads and sharp corners. My concern was scratching walls and baseboards. Next I ruled out those with Velcro attached cleaning clothes. I knew that I would be making my own replacements (the refills they sell can be pricey) and I have found in the past that after a while, Velcro seems to not want to stay attached.

So, what did I end up with? A Dirt Devil Spray+Mop with Swipes. It has an easily refillable reservoir which holds a decent amount of my homemade cleaner, swivel head which is not to large to get around toilets and narrow spaces and rubber ends on the head which flexible enough not to mar any walls, furniture or baseboards. Not to mention there was an attached $3.00 off coupon attached by the manufacturer. I just couldn't pass it up. It's perfect! Now, on to our project.

I went to my local dollar store and bought a couple of microfiber cleaning cloths. I chose the ones with mesh on the back because I thought it would lend a little more durability.


Now the refill pads you buy have a foam core. I needed an absorbent layer. I happened to have a brand new package of chamois cloths at the house that had been given to my hubby as a gift. FREE! The only other thing required was elastic strapping to hold it in place on the mop. I happened to have some (yes I'm a pack rat) which was cut off an adjustable medical belt. Perfect for what I needed! I would imagine that any absorbent fabric would do. Terry cloth, thin sponge material or layers of flannel would work as well. Right now JoAnn Fabrics has flannel on sale for 60% off. Solids are $2.40 a yard. Great deal if you would like to use that! Whatever you choose, all of your materials for this project can be purchased at your local craft or sewing store.

I first traced the pad which came with the mop on my chamois cloth and cut them out.


Next, pin and sew the elastic to the chamois. I used a simple straight stich on my machine. Make sure you stich around the whole end of the cloth so it holds better to the mop.


Now pin your chamois piece with elastic sewn on to your microfiber cloth with wrong sides together. Make sure that the elastic is facing up and the microfiber down. (You can see the stitching around the end of the elastic in this pic)


I know that not everyone has a serger, so I decided to sew this with a regular machine. I did a satin stich around the entire edge. I chose to sew before I cut the microfiber to make the edges easier to handle. This is what it looks like.


Cut around your cloth making sure not to cut your stitching. I then sewed three lines of straight stich down the center to hold everything in place. I didn't measure anything, I just eyeballed it. Just don't sew over your elastic.

You have now made your own stick mop replacement cloths! Yeah for you!


I have found that I prefer my homemade ones to the one that came with the mop. I made up several so when I'm mopping, when they get dirty I either switch it out or rinse it out and keep going. Throw in the wash and lay flat or hang to dry. So easy!

I love being able to use my own cleaning solutions with ease in my home without the waste. I know it probably sounds silly, but I can't help smiling when I mop now knowing that I made these and my cleaner myself! I hope that this inspires you to give it a try. Mopping can be fun!

Have a blessed day and I'll see you soon.

Tina:)

Friday, February 21, 2014

FRIDAY!!!

Every week we look forward to Friday. I'm sure a lot of you do too. It's the end of the work week and the weekend finally arrives. For us, Friday night is Family Night. We play games, watch movies and stay up late spending time together. It is so much fun! It has been a wonderful tool to keep our family closely bonded. We love to spend that time together.

One of my boys favorite things about Friday Family Night is dinner. Pancakes! They love pancakes, so when we started having Family Nights last fall they decided that we should have pancakes every Friday. We don't just have regular pancakes though. We try to come up with different pancake creations each week. We add all kinds of things to our batter, peanut butter, chocolate chips, different fruits, cinnamon, even bacon and many other things. So far they have all been successful (thank goodness) and it makes it really fun to try and come up with original concoctions each week.

So, in honor of Family Night I thought that I would share my "Master Pancake Recipe". I originally got this from a the book Food from an American Farm
by Janeen A Starlin. It has lots of different recipes that I have used over the years. This by far has been the most used and I have tweaked it a bit but I will list it as published here today.


Master Pancake Recipe

Ingredients:
  2 Eggs
  2 cups Flour
  2 Tbsp Sugar
  2 Tbsp Baking Powder
  1 tsp Salt
  1 1/2 cups Milk
  4 Tbsp Butter (melted) or Vegetable Oil
  1 to 2 Tbsp Vegetable Oil for greasing pan

Instructions:
  In small mixing bowl, beat eggs. Add flour, sugar, baking powder, salt, milk and butter or oil; beat until smooth. Heat pan until very hot. Lightly grease with oil and pour 1/3 cup batter into pan. Cook until puffed and dry on edges; flip over and cook until golden brown. Serve immediately.

Makes 12 - 6" pancakes

I have found that these freeze well so you can make these ahead and reheat at breakfast time. For fluffiest pancakes, use the batter when you make it. I use my Presto 07037 Jumbo Cool Touch Electric Griddle, Black
to cook these (link is to the latest model as mine is pretty old) and use a temp of between 350 & 375 degrees. If you get the book there is also an recipe for Old Fashioned Griddle Cake Syrup too that is amazing.


I hope that you enjoy the pancakes and have a great weekend. If you don't have a family time of your own, start one. We only have our kids for a short while...enjoy them! You will never be sorry.

Tina