Now, I know that it isn't Monday but today I thought that I would share my favorite sock pattern with you.
I will be forgoing my play day in the craft room in favor of visiting family. It should be a lot of fun. It is such a beautiful day here! Whenever I go somewhere I always bring my knitting with me. It is a nice productive way to pass the time as we visit. It's hard for me to be idle. I usually am working on a pair of socks at any given time. It makes the perfect take along project as it doesn't take up much room to tote around.
My favorite pattern is from Red Heart Yarn for their self striping socks. I have used it for years with just a couple adaptations. I love using the striping yarn because they are so pretty when they are done and it is easier than carrying several different colors with me to create a pattern. Just not into plain Jane socks.
So, here is the basic pattern. (I do a K3, P1 to make them ribbed for the leg and top of the foot.)
Self-Striping Knit Socks
LW1619
Directions are for size 5-5½; changes for sizes (6- 6½, 7-7½, 8-8½, 9-9½, 10-10½, 11-11½, 12-12½) are in parentheses.
RED HEART® “Heart & Sole™”: 2 (2, 2, 2, 2, 2, 3, 3) Balls No. 3965 Razzle Dazzle.
Double-pointed Knitting Needles: 2.75mm [US 2]. Stitch marker; yarn needle.
GAUGE: 36 sts = 4”; 48 rnds = 4” in St st. CHECK YOUR GAUGE. Use any size needles to obtain the gauge.
NOTE: Slip all sts as if to purl.
LEG: Cast on 48 (52, 56, 60, 64, 68, 68, 68) sts, dividing sts on 3 needles. Join to work in the round taking care that sts are not twisted. Work in K2, P2 ribbing for 1¼ (1¼, 1½, 1½, 1½, 1¾, 1¾, 1¾)”. Now work in St st, K every rnd, until 7 (7, 8, 8, 8½, 9, 9½, 9½)” from beginning.
Divide for Heel: With the 4th needle, K12 (13, 14, 15, 16, 17, 17, 17) sts on first needle, slip the same number of sts from 3rd needle onto the opposite end of the 4th needle – 24 (26, 28, 30, 32, 34, 34, 34) sts on 4th needle for Heel. Cut yarn. Divide the remaining 24 (26, 28, 30, 32, 34, 34, 34) sts evenly onto 2 needles for the Instep to work later.
With wrong side of work facing and working on heel sts only, work as follows: Row 1 (Wrong Side): Slip 1, P to end. Row 2: * Slip 1, K1; repeat from * across. Repeat Rows 1 and 2 for 2 (2, 2, 2¼, 2¼, 2¼, 2¼)”, end by working Row 1.
Turn Heel-Row 1 (Right Side): K14 (15, 16, 17, 18, 19, 19, 19) sts, K2tog, K1; turn. Row 2: Slip 1, P5, P2tog, P1; turn. Row 3: Slip 1, K6, K2 tog, K1; turn. Row 4: Slip 1, P7, P2tog, P1; turn. Continue in this manner, working 1 st more st before the decrease every row until all heel sts have been worked, end by working a K row – 14 (16, 16, 18, 18, 20, 20, 20) sts remain.
Gusset: With the first needle, pick up and K12 (12, 12, 16, 16, 16, 16, 16) sts along edge of heel; slip the Instep sts onto one needle and with the 2nd needle, K24 (26, 28, 30, 32, 34, 34, 34) sts of Instep; with the 3rd needle, pick and K 12 (12, 12, 16, 16, 16, 16, 16) sts along other edge of heel and with same needle K7 (8, 8, 9, 9, 10, 10, 10) sts from heel needle. Slip remaining sts from heel needle onto first needle. There are 19 (20, 20, 25, 25, 26, 26, 26) sts on first and 3rd needles and 24 (26, 28, 30, 32, 34, 34, 34) sts on 2nd needle.
Shape Instep-Rnd 1: K to last 3 sts on first needle, K2tog, K1; K cross 2nd needle; on 3rd needle, K1, slip 1, K1, psso, K to end. Rnd 2: K. Repeat last 2 rnds until 12 (13, 14, 15, 16, 17, 17, 17) sts remain on each of the first and 3rd needles. Work even until 4 (4¾, 5½, 6¼, 7¼, 8, 9, 10)” from center back of heel.
Shape Toe-Rnd 1: K to last 3 sts on first needle, K2tog, K1; on 2nd needle, K1, slip 1, K1, psso, K to last 3 sts, K2tog, K1; on 3rd needle, K1, slip 1, K1, psso, K to end. Rnd 2: K. Repeat last 2 rnds until 16 sts remain. With 3rd needle, K across sts of first needle – 8 sts on each of 2 needles. Cut yarn leaving a 20” length of yarn. Graft sts together.
Grafting: Thread needle with yarn. Holding the 2 needles together with yarn at the right of the back needle, draw yarn through next st on front needle as if to purl, leave st on needle,* draw yarn through next st on back needle as if to knit, leave st on needle, draw yarn through same st on front needle as if to knit, drop st off needle, draw yarn through next st on front needle as if to purl, leave st on needle, draw yarn through same st on back needle as if to purl, drop st off needle. Repeat from * until all sts are grafted together. Fasten securely on wrong side. Take care to draw yarn up so that gauge of grafting equals gauge of knitted sts.
RED HEART® “Heart & Sole™ with Aloe”, Art. E745 available in multicolor 1.76 oz (50 g), 213 yd (195 m) balls.
ABBREVIATIONS: K = knit; mm = millimeters; P = purl; psso = pass the slipipped st over; rnd = round; sl = slip; St st = Stockinette stitch (Knit every round); st(s) = stitch(es); tog = together; * = repeat whatever follows the * as indicated
I have used this pattern with all types of sock yarns with success. I really like using wool blends in particular. You just have to remember to not dry them in the dryer!
Hope you enjoy making these. I have dozens of pairs and love them! But, now I'm off to the in-laws. Hope you have a great day!
Tina :)
Ok, all of us know that plastic is bad stuff! It's one of those things that I have known for years but have never been very diligent to do anything about. I mean, it is everywhere! You can hardly escape it. So, what's a person to do? Well, I am finally going to try to do whatever I can to eliminate as much as I can from my home.
I recently read an excellent article about plastics (it is a little long but worth the read) at http://www.motherjones.com/environment/2014/03/tritan-certichem-eastman-bpa-free-plastic-safe?page=1. [Disclaimer: I do not agree with many of the views on this site but the article referenced is very good.] It really hit home and hit hard. I knew that I finally had to do something about it for my family. After all, I have eliminated all the paper products in my home. I know that I will not be able to get rid off all the plastic in my house (I can't very well rip the PVC pipes out of the walls) but there are things that I can do.
My first task was the kitchen. I have been gradually switching to glass storage containers for food as I have needed replacements. Everything that was plastic came off the shelves! Water bottles, Rubbermaid containers, popsicle forms, Jello molds....almost everything! I say almost because there were a few things like my colander, ice cube trays and measuring spoons that I need to replace with stainless steel before I dispose of them. All the plastic kid's cups, bowls and plates went though along with the plastic pitchers. When my 14yr old son asked what I would do with all the stuff I told him that I would donate it. He said, "so, you are just going to poison other people?" Little smarty pants! Throwing it away means it will end up in a landfill though. So, it is sitting in a box for now. Not sure what to do with it all.
Now one of my biggest dilemmas is what to do about my deep freezer. I have a freezer full of meat and veggies that I have stored in airtight plastic (seal a meal bags). The bags are BPA free but that is not the only dangerous chemical in plastics. I know that this year I will be canning all of my veggies, but I'm not really keen on canned meat. I know that I can put meats in metal containers, but I stock up when I can. I don't want it all getting freezer burn and spoiling. Not sure what to do. If any of you out there have any tips or tricks I would really appreciate it! Having a stocked pantry and freezer is important to me.
Of course I am getting a little flack from my family! The kids don't like seeing their favorite drinking cups and water bottles go and my husband was kind enough to point out that a lot of my glass containers have plastic lids. (I have found glass containers with glass lids like this Anchor Hocking 12-Cup Baking 'N' Store Dish with Glass Lid on Amazon that I will be getting from now on though.) As he so kindly pointed out, we have plastic everywhere. Thanks! Hadn't noticed! So help me do something about it! (Sorry, sarcasm runs deep in my family.)
It almost feels like an impossible task! The more I look around my house the more plastic I see. I know this will be a huge undertaking but it is one that I feel is important to the health of my crew. After all, it is my job to keep my home safe for everyone. It is a job that I take very seriously.
Well, I apologize if this post has been a little on the dark and depressing side. Unfortunately, I could go on and on but I think that I've made my point. This has just really been on my heart lately, so I decided that I should share it with you all. We are all in this together after all.
If you have any suggestions for me or would like to share some of the ways that you have eliminated some of your plastic use please do! I would like to hear about it. Thanks for listening to me vent today. I promise to post a more upbeat piece next time.
Tina :)
on Amazon that I will be getting from now on though.) As he so kindly pointed out, we have plastic everywhere. Thanks! Hadn't noticed! So help me do something about it! (Sorry, sarcasm runs deep in my family.)
It almost feels like an impossible task! The more I look around my house the more plastic I see. I know this will be a huge undertaking but it is one that I feel is important to the health of my crew. After all, it is my job to keep my home safe for everyone. It is a job that I take very seriously.
Well, I apologize if this post has been a little on the dark and depressing side. Unfortunately, I could go on and on but I think that I've made my point. This has just really been on my heart lately, so I decided that I should share it with you all. We are all in this together after all.
If you have any suggestions for me or would like to share some of the ways that you have eliminated some of your plastic use please do! I would like to hear about it. Thanks for listening to me vent today. I promise to post a more upbeat piece next time.
Tina :)
 My quest to eliminate all paper products from my home has inspired this weeks Make it Monday projects. Today we will make tissues and handkerchiefs. These are two super quick and easy ways to cut down on your families waste of money and natural resources.
It is still cold and flu season around here soon to be replaced by allergy season. We use a lot of tissues at our house year round. Seems that someone is always blowing their nose! My hubby always has a hanky on him but the rest of us have always used disposable tissues. It doesn't seem to matter which brand you buy though, even if you use the "super soft" ones with lotion you always end up with a sore red nose. No more though! Now we are using the softest tissues you could imagine. Flannel.
Now these are made the exact same way that we made our fabric napkins before so I won't go into a huge amount of detail. Just a few quick tips.
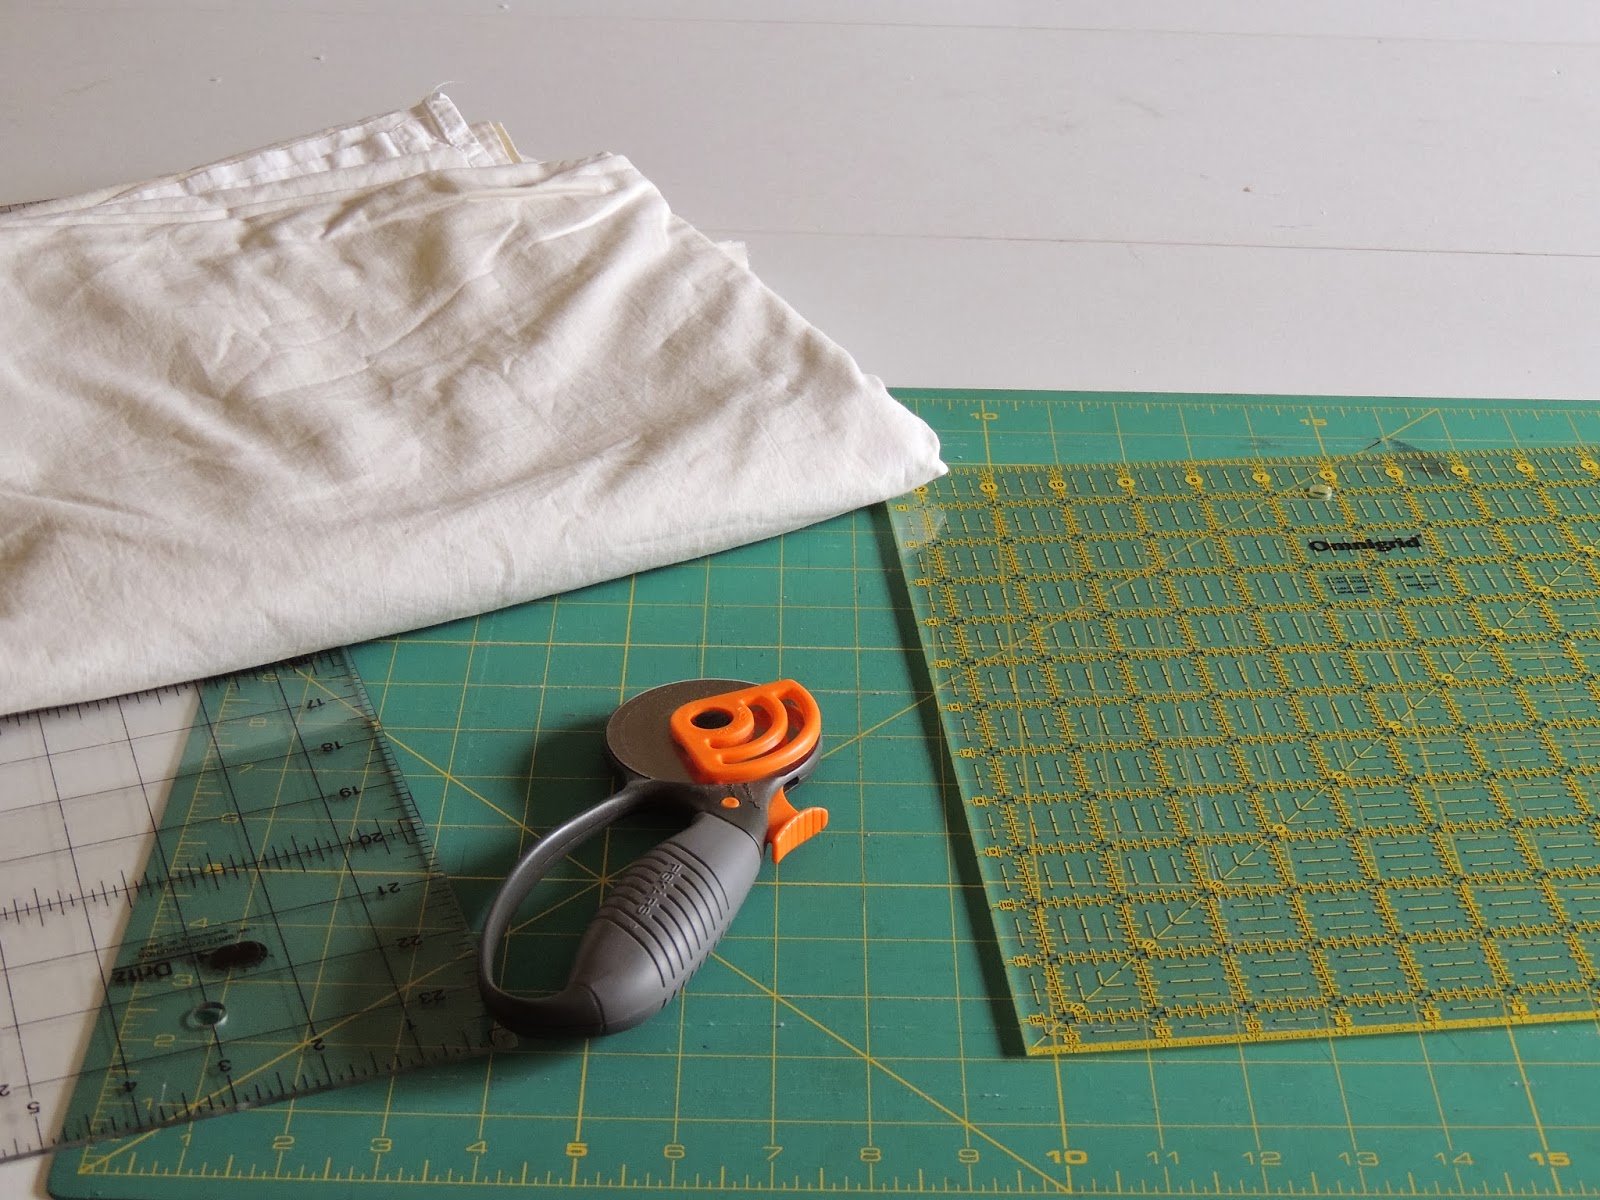
I purchased a whole bolt of white cotton flannel when it was on sale at JoAnn Fabrics a while back. I seem to use it for everything! This is what I decided to make my tissues out of. Now, your average tissue measures approximately 8 to 8 1/2 inches square. Since I want to recycle my old empty tissue boxes, I decided to keep them about the same size.
First step is to wash and dry your fabric to pre-shrink it.
Next, I cut 9 inch wide strips (to allow for the serged edge) followed by using my quilting square to cut the strips into 9 inch squares.
Then you just need to serge around your edges and your done. I made a couple dozen to put in several old tissue boxes around the house. I love how these feel on my nose! Much better than paper!
For the handkerchiefs, the process is exactly the same except for the size, material and the finished edge. I have a king size cotton top sheet that my old washing machine ate. I was so mad! It literally ate holes in the sheet and ripped part of the top edging off. I have been holding on to it because it is really nice material and I knew that I could eventually use it for something. Now I am!
If you don't have anything around the house to repurpose, I would recommend a medium weight muslin or cotton fabric. It is inexpensive and if you have a JoAnn Fabric & Crafts near you, sign up for their mailing list, they always seem to have coupons for fabric.
I decided on 12 inch square for my measurements as that is about the size of the cotton hankies that I have bought my husband in the past. Cutting off the edges and working around holes, I was able to get 50 squares. We will have plenty of hankies for a long time!
For the edge I decided to use the rolled hem foot on my regular sewing machine. Now, I have never used it before so I went on YouTube and found several tutorials that helped. I advise it if you are just starting with the foot too because it is a bit tricky. After 50 hankies I am sure to get it down though. Here is what the foot looks like.
If you don't have one of these, just fold over your edges 1/8 inch, press, and fold over again straight stitching close to the edge of your fold.
After stitching around all sides you will have your own handmade handkerchief! Of course, I couldn't stop there. I wanted to add a little detail to them to make them more special. So, I used a decorative leaf stich along one side. I think they turned out really cute. So glad I made these!
There you have it. Two super easy ways to eliminate another paper product from your home. Bravo for you! Hope you enjoyed this. Back next Monday with something a little different for you. Have a super day!
Tina :)
My quest to eliminate all paper products from my home has inspired this weeks Make it Monday projects. Today we will make tissues and handkerchiefs. These are two super quick and easy ways to cut down on your families waste of money and natural resources.
It is still cold and flu season around here soon to be replaced by allergy season. We use a lot of tissues at our house year round. Seems that someone is always blowing their nose! My hubby always has a hanky on him but the rest of us have always used disposable tissues. It doesn't seem to matter which brand you buy though, even if you use the "super soft" ones with lotion you always end up with a sore red nose. No more though! Now we are using the softest tissues you could imagine. Flannel.
Now these are made the exact same way that we made our fabric napkins before so I won't go into a huge amount of detail. Just a few quick tips.
I purchased a whole bolt of white cotton flannel when it was on sale at JoAnn Fabrics a while back. I seem to use it for everything! This is what I decided to make my tissues out of. Now, your average tissue measures approximately 8 to 8 1/2 inches square. Since I want to recycle my old empty tissue boxes, I decided to keep them about the same size.
First step is to wash and dry your fabric to pre-shrink it.
Next, I cut 9 inch wide strips (to allow for the serged edge) followed by using my quilting square to cut the strips into 9 inch squares.
Then you just need to serge around your edges and your done. I made a couple dozen to put in several old tissue boxes around the house. I love how these feel on my nose! Much better than paper!
For the handkerchiefs, the process is exactly the same except for the size, material and the finished edge. I have a king size cotton top sheet that my old washing machine ate. I was so mad! It literally ate holes in the sheet and ripped part of the top edging off. I have been holding on to it because it is really nice material and I knew that I could eventually use it for something. Now I am!
If you don't have anything around the house to repurpose, I would recommend a medium weight muslin or cotton fabric. It is inexpensive and if you have a JoAnn Fabric & Crafts near you, sign up for their mailing list, they always seem to have coupons for fabric.
I decided on 12 inch square for my measurements as that is about the size of the cotton hankies that I have bought my husband in the past. Cutting off the edges and working around holes, I was able to get 50 squares. We will have plenty of hankies for a long time!
For the edge I decided to use the rolled hem foot on my regular sewing machine. Now, I have never used it before so I went on YouTube and found several tutorials that helped. I advise it if you are just starting with the foot too because it is a bit tricky. After 50 hankies I am sure to get it down though. Here is what the foot looks like.
If you don't have one of these, just fold over your edges 1/8 inch, press, and fold over again straight stitching close to the edge of your fold.
After stitching around all sides you will have your own handmade handkerchief! Of course, I couldn't stop there. I wanted to add a little detail to them to make them more special. So, I used a decorative leaf stich along one side. I think they turned out really cute. So glad I made these!
There you have it. Two super easy ways to eliminate another paper product from your home. Bravo for you! Hope you enjoyed this. Back next Monday with something a little different for you. Have a super day!
Tina :)